· 6 min read
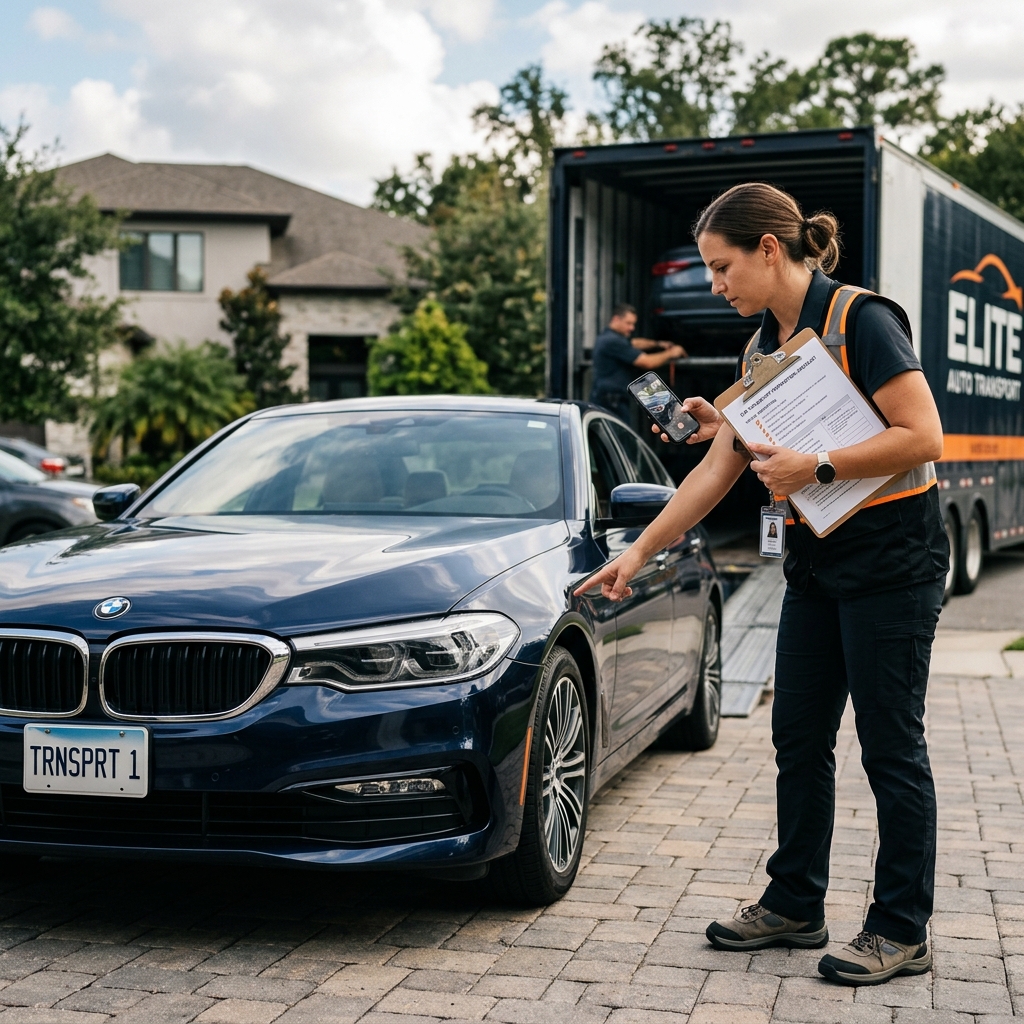
Why Preparation Matters More Than Most People Think
The bill of lading — the condition report the driver signs at pickup — is the most important document in any auto transport shipment. It is your legal record if a dispute arises over damage. A vehicle that is dirty, inadequately photographed, or loaded with undisclosed personal items creates claim complications that are nearly impossible to resolve in your favor after the fact.
The good news: twenty minutes of preparation before the carrier arrives eliminates 90% of claim complications. This checklist walks through every step in the order you should complete them, along with the reasoning behind each one so you understand what you are protecting against.
This process applies whether you are using open transport or enclosed transport and whether it is a door-to-door or terminal-to-terminal shipment.
Step 1: Wash the Exterior and Photograph Every Angle
A clean vehicle is a documented vehicle. Existing scratches, chips, dents and scuffs are clearly visible on a clean surface. They are invisible under a layer of road dust and pollen.
After washing, photograph all four sides, both bumpers, the roof (if you can access it safely), the interior (dashboard, seats, floors), the odometer reading, and any existing damage in close-up. Use your phone's date-stamp feature or photograph the car next to a newspaper showing the date. Your photos serve as your evidence if anything is disputed at delivery.
Do not wax the vehicle immediately before transport. Certain wax formulations create a surface to which road dust and highway debris bond during multi-day transit. Wash, rinse, air-dry — do not wax.
Step 2: Document Every Pre-Existing Scratch and Dent on the Bill of Lading
At pickup, the driver will produce a bill of lading with a vehicle diagram. They will walk around the vehicle and mark existing damage. Your job is to walk with them and make sure nothing is missed.
If the driver skips a chip or scratch you know exists, point it out and ask them to add it. If they note damage you cannot identify, ask them to point to it exactly before you sign. Your signature on a bill of lading without damage notations is a legal statement that the vehicle was in undamaged condition at pickup. If something shows up at delivery that was not marked, your claim becomes nearly impossible.
Photograph the completed bill of lading before you hand over the vehicle.
Step 3: Remove All Personal Items
Carrier cargo insurance covers the vehicle itself — not the contents inside it. Electronics, clothing, documents, car seats, aftermarket audio equipment and any personal valuables you leave in the car are shipped at your own risk with zero coverage.
Beyond the insurance issue, loose items shift and migrate during transit, especially on multi-day cross-country moves. Items in the back seat can scratch interior panels. Liquids can spill. Heavy items in the trunk can cause uneven loading.
The DOT allows carriers to transport up to 100 lbs of personal belongings in the trunk, below the window line. This is a legal maximum, not a recommendation. Anything you leave is at your risk. Remove it.
Step 4: Leave a Quarter Tank of Fuel
The driver needs enough fuel to load, drive off the carrier at each stop and deliver the vehicle. A quarter tank is enough for all of that on any shipment. A full tank adds approximately 120 lbs to the vehicle weight. Carriers are DOT-regulated for gross vehicle weight, and overweight loads can generate fines that end up passed to the shipper.
Do not leave the car on empty, either — if the driver needs to maneuver it off the deck and there is not enough fuel to start the engine, you have a problem.
Step 5: Disable Aftermarket Alarms
Factory alarms that respond to the key fob are fine. Aftermarket alarms — particularly those that arm themselves automatically on a timer or that vibration activates — will drain the battery over a 5–10 day cross-country shipment.
Disable them or pull the fuse before pickup. Note on the bill of lading that the alarm has been disabled. If the driver has trouble starting the vehicle at delivery because of a dead battery triggered by an alarm drain, you will be responsible for the jump-start delay.
Step 6: Retract Antennas and Remove External Accessories
Open carriers load vehicles with tight lateral clearance between adjacent cars and between cars and carrier rails. Extended antennas, roof racks, cargo carriers, bike mounts and oversized spoilers are all candidates for damage during loading and transit on an open carrier.
Retract all retractable antennas. Remove any roof accessories you can remove easily. If you cannot remove a rack, tell your coordinator at booking — they can flag it for the carrier and confirm clearance requirements before dispatch. Similarly, if your vehicle is lowered, lifted or has a wide body kit, disclose this at quote time so the right carrier is assigned.
Step 7: Identify and Disclose Fluid Leaks
A vehicle that actively drips oil or coolant onto a carrier deck creates a safety hazard and potential damage to other vehicles below it on the multi-level carrier. Carriers reserve the right to refuse vehicles with active, significant drips at pickup — and you will still owe the dispatch fee.
If your vehicle has a known fluid leak, disclose it when booking. Some carriers will accept minor seepage with a drip tray arrangement. Others will not accept a leaking vehicle at all. Knowing this before the driver arrives eliminates a same-day crisis.
Step 8: Fold In Side Mirrors and Disclose Special Clearance Requirements
On tight open-carrier decks, extended side mirrors can contact adjacent vehicles or carrier rails during loading and transit. Fold them in before the driver arrives.
If your vehicle is inoperable or requires special handling to start, steer or brake — disclose this at booking. Inoperable vehicles require winch or liftgate equipment and are priced accordingly. A vehicle the driver discovers is non-running at pickup that was booked as operational creates delays and may result in the shipment being refused.
Step 9: Prepare Your Authorized Representative If You Cannot Be Present
Someone 18 years of age or older must be physically present to sign the bill of lading at both pickup and delivery. If it is not you, the person you designate needs to understand their responsibilities.
Brief your representative clearly: walk around the vehicle with the driver, compare the car's condition to the photos you took, note any additional items on the bill of lading before signing, and do not sign anything they are not comfortable with. A signature is a legal release — it matters.
If your representative is a dealership employee, property manager or neighbor, give them your phone number so they can reach you for any questions before signing.
Step 10: Hand Over One Key Only
Give the driver one key. Keep your spare. If a key is lost during transit — rare but it happens — you still have access to your vehicle at delivery. This is a simple precaution that costs nothing and eliminates a significant inconvenience.
Include a small note with the key identifying your name, the vehicle and the destination contact — especially if the vehicle is going to a dealership or business address where multiple shipments arrive on the same day.
At Delivery: Mirror the Pickup Process
Everything you did at pickup, do again at delivery. Walk around the vehicle before signing the delivery receipt. Compare its condition to your pickup photos and to the bill of lading damage notations. Photograph the vehicle again — all four sides, bumpers and roof — before the driver leaves.
If you notice new damage that was not present at pickup and is not noted on the bill of lading, document it immediately on the delivery receipt, photograph it with the driver present, and do not sign a clean delivery receipt. Your claim documentation begins in this moment.
Need to understand what is covered and how claims work? Our how car shipping works page walks through the entire process from quote to delivery. Ready to book? Get a free instant quote and see what our vetted carrier network can do for your move.

ACS Dispatch & Compliance Team
Written by the American Car Shipping operations team. With over a decade of experience and 41,000+ vehicles successfully transported, we share practical industry insights, pricing transparency, and carrier vetting strategies.